
The State of the House - 3rd Floor
4:08 PM
This post has been a long time coming, because I really wanted to have some progress to report when I finally posted about the third floor. As I may have mentioned before, the third floor was originally the servant's quarters for this home, and is surprisingly spacious! People hear third floor or attic and they think tiny and cramped. Well, it's definitely not that. It's not even a true attic - there is a true attic which accessible via a tiny hatch in the ceiling of the third floor.
So far, everyone I have taken to the third floor has been shocked by how much space is actually up there. There are three bedrooms plus a bathroom and two of the rooms have eaves closets which are huge. They just are unfinished, so you are all up in the insulation if you open the closet. Plus, several of them used to host raccoons or other mammals, and we have yet to clean up the mess they made. You'd think we'd tackle that right away, but honestly, it took so long to get rid of all the squirrels that we were sort of in denial about the condition of those closets. Possibly still are.
Plus, since we have no shortage of storage in our basement, we aren't using those closets for anything at the moment. There are also two closets in the hallway which were added on to the house by the previous owners - as clothes closets. There are no "true" clothes closets in the third floor rooms. So, without further ado...here we go.
As you can see from the top picture, the stairs to the third floor lead up from the second floor hallway. Head directly to the master bedroom and then veer left.

This picture was taken in June of 2016 at our first official showing of the house. The stairs were covered with hideous brown carpet that was a peach color once upon a time, and it was so stiff with age that it was popping off the treads. Plus, the risers were thoroughly beat up from decades of feet hitting them. Wish I could say that has been addressed, but not yet.

The stairwell is pretty steep and the the walls are painted a light teal color.
Along the upper right side, three windows let in a lot of light and look out over our neighboring condo building's roof.

There was obviously a lot between our house and the next one over and a condo was built there about 30 years ago.

There were shelves installed on the wall which no longer remain. And I'm pretty sure the light fixture hanging up there is really really old. I love it, actually.

It's on this third floor that the plaster walls look the worst. The most significant cracks start to show up, although we really can't address any of them until we have the roof re-done.

Here is a close up of the top of the stairs - original moldings, a cracked baseboard and some insanely disgusting carpet.

At the top of the stairs, you turn left into a hallway and directly in front of you is a bedroom.
The hallway is covered in the same hideous tramped down, grungy carpet that the stairs got us all excited about...leading enthusiastically into to what can only be described as vomit colored yellow shag. To its credit, it matched the funky 70's era wall-paper which covered part of this room.

In this room, there were shelving units randomly scattered about, a little built-in wall desk included.

There is a strip along one wall where there is no wall paper or paint, and I frankly have no idea what the story is there. Up behind Brooklyn, you can see the original gas lighting sticking out into the room before the house was modernized with electricity. It's pretty cool looking.

The same room at dark...check out those disgusting stains on the carpet. I don't even want to think about it. It's so gross. This room faces east and gets lovely sun during the day. Yes, those are plaster cracks in the wall on the right.

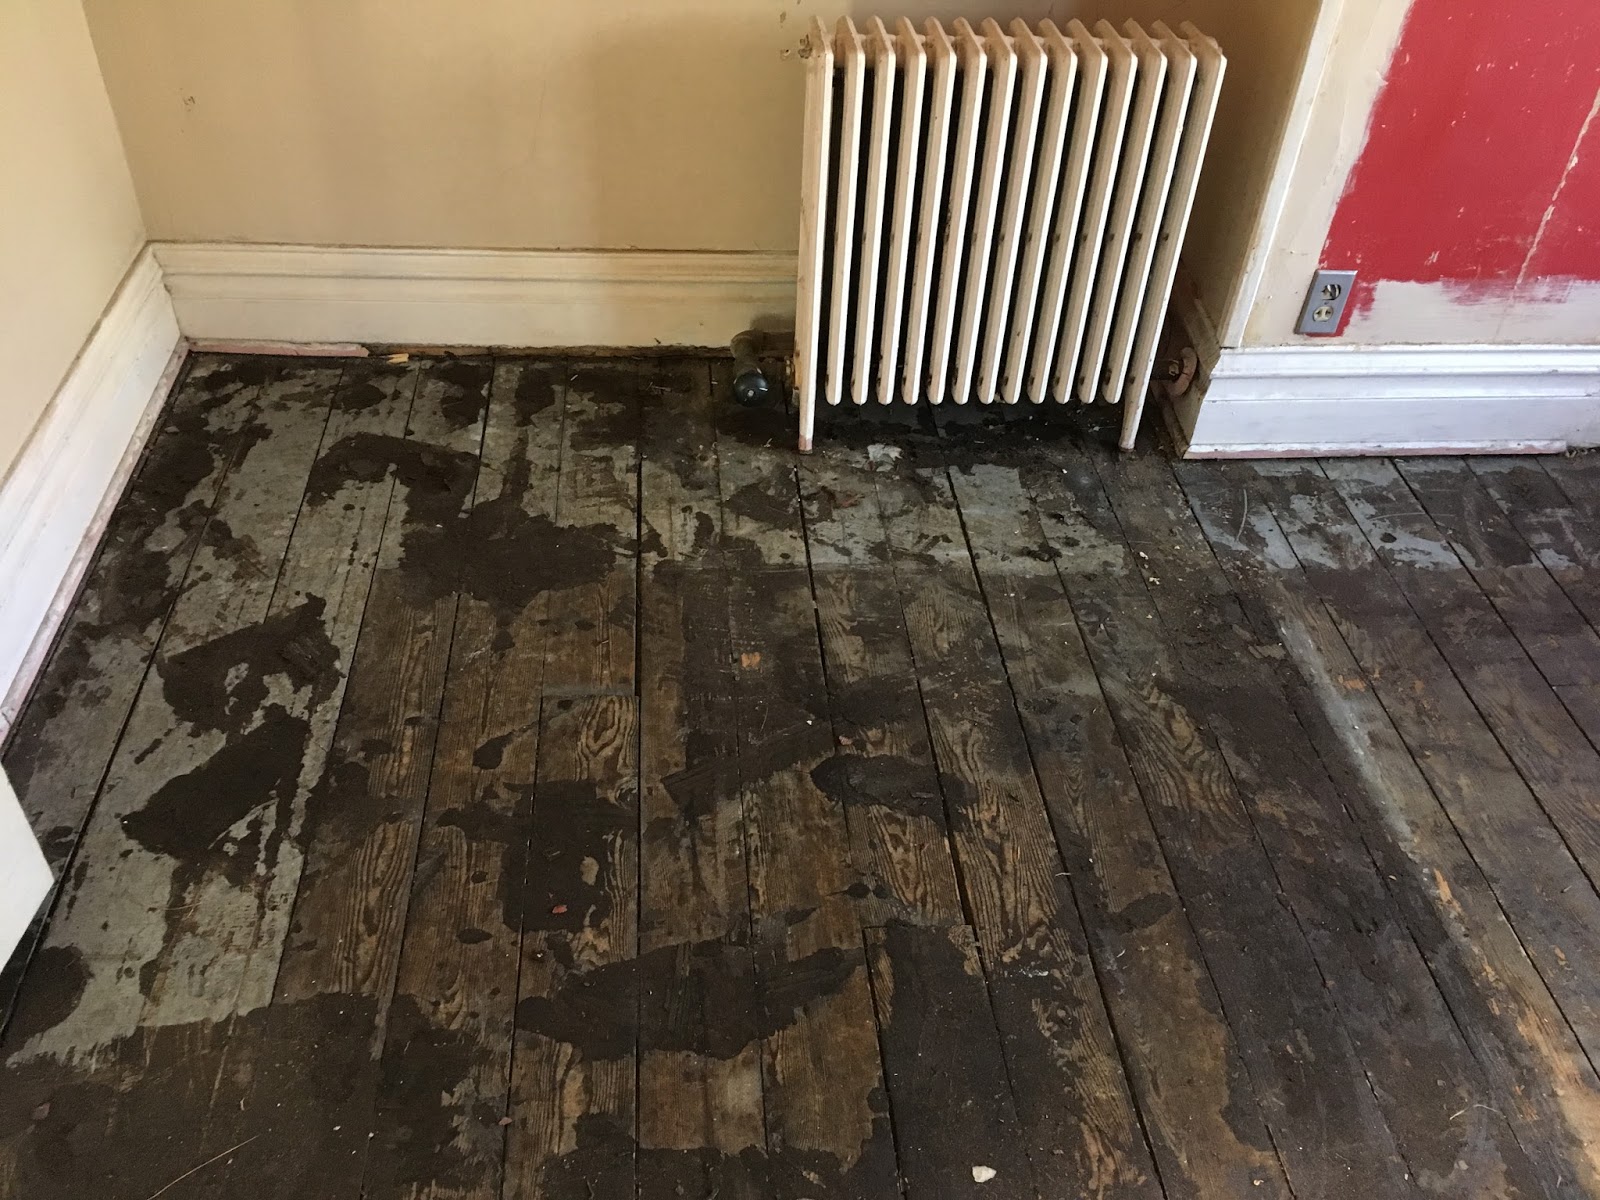
There is a radiator in the room and in all the rooms up on this floor, so you won't freeze in the winter. And this perspective gives you a glimpse into the hallway.

It's a decent sized room with lots of potential. I don't even hate the wallpaper. I don't love it, either, but it is kinda cool. It's just not....staying.

Because I really want a good "before" status shot, I am getting all up close and personal on what is a pretty awful nook. Not the nook itself, but it's overall shape. There was a leak at some point because the plaster is a little bubbly, and there are cracks.

Walking out of that bedroom into the hallway, you turn left into a small space which opens into the bathroom, an eaves closet (to the right) and a long narrow bedroom to the left.
I kind of like the flowery wall paper, but it's not in great condition, and I really do NOT like all the metal cheap looking shelves, so when they come off, so will the wallpaper. (The red flooring you see is what was underneath the wallpaper...more on that in a minute).

Standing in the hallway, to the left is another bedroom and the bathroom is straight ahead.
This picture is also from that first showing, and the room was full of stuff from the previous owner. There were so many random shelves, it was truly remarkable.

But the bathroom first.
The linoleum won't be staying, obviously.
The super awesome vintage cast iron sink - yes. I love it.
I do plan to change out the fixtures, though.

Just a glimpse of what looks like an ancient plastered wall in Rome or something...
Needs some cleaning up, but truthfully, this whole shower will eventually be re-done. I actually think the look of the wall is pretty cool. We will need new tub and shower fixtures at some point.

Flaking paint, ugly shower curtain that is no more...

Turning back around, you see through the little hallway into the longer hallway down to the biggest room of the third floor. But we'll get there in a minute.

Back to the long narrow room beside the bathroom. Covered in horrific carpet, wallpaper, ginormous (non-working) track lighting and one really neat, super old light fixture. I love that all the light fixtures are period.

Same room, looking north (after we'd moved in and all the junk had been cleared away).
The whole left side of the wall has been covered in rough plank-type boards with cut-outs of cork board. And there's a large, super heavy display cabinet mounted on the wall. That has since been removed and sold on Craigslist!

Another shot of the room cleared of its "stuff" and many random metal shelves.
Again, I don't hate the wallpaper. It's just dirty and worn out. And the carpet is so gross that it made me cringe to walk on it at all.

Ok, now moving to the biggest room on this floor. It's the room at the end of the hallway, facing north. There is a short little door on the right leading to an eaves closet and another one on the left.
Yes, the carpet is green. Puke green with a hint of yellow mixed in. And the wallpaper is less bright than this picture reflects, because this was a real estate photo and was unnaturally bright.
Huge horizontal crack in the plaster running on the right wall.

This is from our showing in June 2016...you can see the metallic bits of the wallpaper. It was ahead of its time, really.

I love the molding of the doors. Not the big crack so much.

More shelves, more cracks...

So. That was how we found it when we moved in.
Mid-December, after we had removed all the carpet from the second floor, I started on the stair treads and removed all the carpet from each tread. Removing the carpet took no time. Removing the many many many sharp nails which remained after the carpet "popped" off took much longer. I won't lie, it was a satisfying job that I didn't mind doing. I felt like a historian! The stairs were all painted, and you can see how the risers had been painted after the carpet was put on - there's a line of white paint which was covered by the carpet. The first few stairs were painted black until you hit the little landing and they all switched to a tan color.

Once the stairs were cleared, the next logical step was to remove the carpet from the rest of the third floor, starting with the "play room" where all our toys were - I couldn't stand the thought of the kids playing on that nasty carpet. So, we moved all the stuff into the hallway and ripped out the carpet.

Just when we thought we'd gotten somewhere, we discovered that below the carpet was red linoleum.
What??

Moving into the second bedroom, we ripped up the carpet and found....
brown linoleum. What??

It was seriously gross. Seriously.
And we could tell there was wood underneath the linoleum.
Who does this to floors? I don't understand!!

Just to give you the WHOLE picture, here's the other corner in all its poopy brown glory.

We pulled all the carpet up from the whole floor and found linoleum everywhere. All brown except for the red in the playroom.

The next step was to rip that out. We did pause for a few weeks to test for asbestos, but it came back all clear, so we proceeded. But even removing this, we suited up head to toe in what amounted to Haz-mat gear. Booties, heavy duty gloves, full body suit, lead paint quality respirator masks...
There was so much stuff flying around that it just didn't seem sensible to do it any other way. We also loaded it all into heavy duty contractor trash bags and hauled it out for pick-up.

What we discovered under the linoleum was original wood flooring, as befitting a servant's quarters. Lower quality, wide wood planking, not sure of the wood type. Really really LONG boards, some 16 feet. And thoroughly coated in leftover mastic from the linoleum. Lest you jump the gun and say, oh, you can just sand that right off...which Kyle momentarily did think about doing...a little voice in my head whispered..."is that wood painted?' Answer: Yes. Next question...."Could it be lead paint??"
Answer: Yes, it could. And yes, it is.
Well......shoot.
That definitely changes the game.
We had to come up with a new plan that involved laboriously stripping the floors of all its toppings, mastic and paint.
After much research, we settled on Peel Away 1 as our product of choice. It gets up everything and neutralizes the lead paint in the process. But it is most definitely a process. A loooong one.
Here's where Kyle gets the Most Amazing Husband DIYer Award of the Century.
Because I had Wilder as a little barnacle, Kyle was the only one who could really do the stripping.

Here's what it looked like. Peel Away 1 is a bucket of paste that is "painted" onto the floor in sections. A special paper comes with it, and after the "paint" on the Peel Away, you cover it with the paper and let it sit for 24 hours. After which time, you take a scraper and peel away the floor covering which is largely contained in the paper you laid over it. It's not quite as neat and tidy as all that, though. Depending on the smoothness of the underlying boards, it may require some very tedious detail scraping with the scrapers.
The Peel Away is also very caustic, so you have to suit up and ventilate well. Fortunately, most of this was done during the winter, so it wasn't hot up there. Many a pod-cast was listened to during these hours and hours. Due to the caustic nature of Peel Away, after the stripping process, the wood has to be neutralized with a chemical called Citrilize which returns the pH to neutral. It involved water and some good old-fashioned scrubbing.
Kyle gave himself a goal of laying several sections a night, then stripping those sections up the following night. It took months.

He started in the biggest bedroom, and the effect is dramatic!
You can see the test square he did initially, and it was incredible.

It's almost unbelievable how different the wood looks. Almost like you bleached it, but it's just returning it to its normal wood color.

Here's a close-up. These boards are laid tongue-and-groove.

Slowly but surely, he moved across the floor. Thankfully, Kyle has the patience of a saint. He got very very good at this, to the point where it wouldn't have been helpful for me to join him, even. He had a system!
In my research of chemical strippers, I initially wanted to go with Peel Away 7, a version of Peel Away that does the same thing as Peel Away 1, but doesn't require a follow-up neutralization step. It is $50 more expensive per bucket, though. So, we decided it was worth it to pay less, since we'd be using so much of it.
You can buy Peel Away at Sherwin-Williams paint stores, and Kyle pretty much cleaned out the neighboring stores. He would call in advance and just buy out all they had in stock. I'm not sure how many gallons we used in all, but I think we spent around $500 in Peel-Away...maybe a little more.
During this process, there were several websites that I used as a resource, including the Craftsman Blog. If you love old houses and have questions about plaster or original windows or stripping paint, I recommend checking out his blog.

In the midst of all this floor stripping, my parents came to visit us towards the end of March. My mom brought with her a steamer to remove wallpaper, and she and my dad graciously removed all vestiges of the 70s from the walls. Thankfully, no big surprise cracks lurked beneath the wallpaper.
It's a different place already!

Amazing!

My plan is to paint the wood flooring with white porch paint. My Dad couldn't believe we would go to all the trouble of stripping it only to paint it, but this floor isn't of a quality to be really sanded and stained. It was painted originally, and I have a vision for this floor with white flooring. Plus, I have two other levels of flooring with stained hardwood floors, so I really want to do something different with this floor...something more like this...

or this...

You see where I'm going? More Scandinavian crisp and clean...

And I think this floor has the makings of being perfect for that look.
Which brings us back to our current state.

After my mom and dad removed the wallpaper from the little anteroom between the main hallway and the bathroom and playroom, they uncovered what can only be described as a red paint fiasco.
Suffice it to say, it's just temporary.

Here is what the walls in the playroom look like underneath the wallpaper.
I actually dig it. It's very Italian fresco or something.

This is what lay beneath the north side of the playroom. Layers of wallpaper, paint, plaster, cracks...but you know what? I love it. It's interesting and beautiful. No, I'm not leaving it this way, although I do love a textured plaster look.

After all the flooring had been stripped, this is where we have landed. Looks remarkably different.
Kyle is my hero.

Here he stands on the stairwell, with his stacked gallons of Peel Away and his doting son, August.

I should keep showing you the rest of the floors, though.
This was the room with the 70's disco wallpaper which concealed red painted walls.
Of course it did. Someone back in the day was a fan of the color RED.
Neither Kyle nor I could figure out what was going on with the floors. There appeared to be a border of paint around the edges...not clear why that would have been done.

And the other side.

More randomly painted red painted walls, more Peel Away, more stuff to strip.

It's such a huge difference from inside this room (unstripped) and out in the hallway (stripped).

All the tools for the job.
Water bottle, paper towels, scrapers, hard bristled brush...

And it becomes this!

Here is that floor mid-process. You can see the damp middle section that has just been scraped and washed. The Dumond laminated paper still covers the section to the left and is about to come up, taking all the mastic, paint and whatever else with it.

The playroom had some different board configurations going on, as though there might have been some patches made over the years? Hard to say.
Yep, more red walls on the end.

Slightly more panned back. We did leave one shelf above the cork wall, which is handy for holding puzzles and games. I'm not yet sure what the plan is for that wall.

Looking down to the other end...

I love the slightly curved wall in this room. And this is the doorway to another eaves closet.

A better look at the wood/cork wall.

The tiny hallway...

Wyeth felt he needed to add some spacial perspective to this shot. You can also see the original gas line on the wall beside him.

Which all brings us to today.
The floor (except the bathroom) has all been stripped and is free of residue, mastic, lead paint, etc.
It's rough and splintery in certain parts, and so we rented this buffer from Clark-Devon Hardware, our favorite hardware store, for a whopping $26 and Kyle lightly sanded the whole floor. We had planned to rent a drum sander, but when Kyle talked with the people and explained what we were doing, they said we didn't need to totally sand - just buff out the rough spots. So we attached sandpaper to the bottom and Kyle wrangled it around the floor. The purpose was to clear out big splinters and prepare it for the next step of painting.

I realize we still have a ton left to do, but we have also done so much!

It is slowly taking shape into the vision I see in my mind.

The cracks in the plaster will be able to be repaired once we have a new roof put on which probably won't be until next spring? Depends on the availability of funds.

No, those baseboards won't stay baby blue.

Another reason I don't want to stain the flooring is because no matter how well we strip the floors, there is variation in the color, and I just really want these floors to be white.

So, that concludes our tour of the third floor. You've seen what we started with: vomit colored carpet in three different hues, wildly varied wallpaper on four different areas, brown and red linoleum underneath the carpet, lead paint underneath the linoleum, really rough flooring and copious amounts of red paint.
We're far from finished, but we are getting much much closer.
Thanks for sticking with me...I'll keep you posted as things progress!


0 comments